VirtualBox Setup Tutorial
System Requirements
To properly run the provided Ubuntu image, we recommend the following at the minimum:
- 4GB of main memory
- 20GB of free disk space.
Overview
We will now set up the virtual machine for the class project. Roughly, you need to take the following steps.
- Download and install VirtualBox software
- Download and import CS246 virtual machine image
- Set up shared folder
- Power on and log into the virtual machine
Step 1: Install VirtualBox Software
- Download and install the VirtualBox software.
- Follow the screen instructions to complete the installation.
- If it asks for installation permission, give the permission.
Step 2: Import Virtual Machine Image
- Download the CS246.ova file. This is the virtual machine image for the class project. Since it is a very large file, it will take a while to download.
- Verify the integrity of the downloaded file by checking its checksum:
- SHA-1 checksum: 8a94e5edd5f9543fb90c702bd38b15a04178bf73
- MD5 checksum: 469f7d9f7693f7ae72277b3d4c526988
On OS X, you can run "shasum CS246.ova" to compute the SHA1 checksum of the downloaded file. On Windows, you can use this tool.
- Start VirtualBox.
- Once it starts, select "File > Import Appliance..." menu.
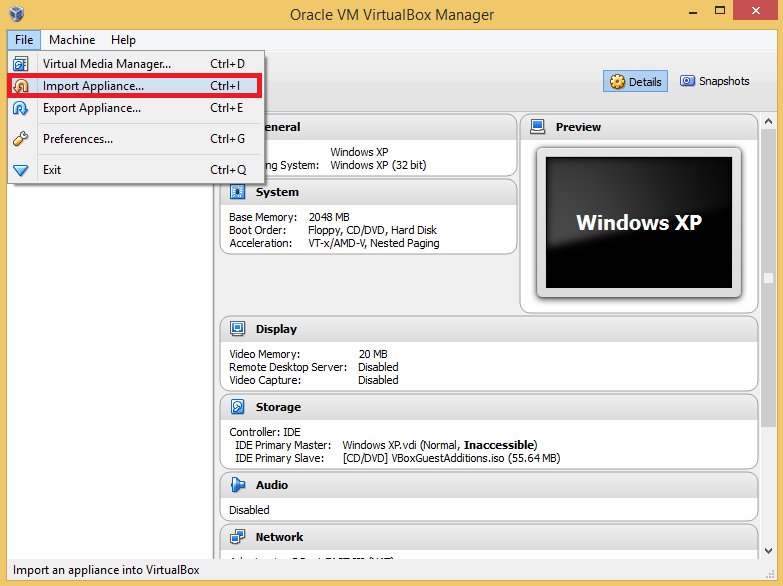
- Choose the downloaded CS246.ova file and click "Next".
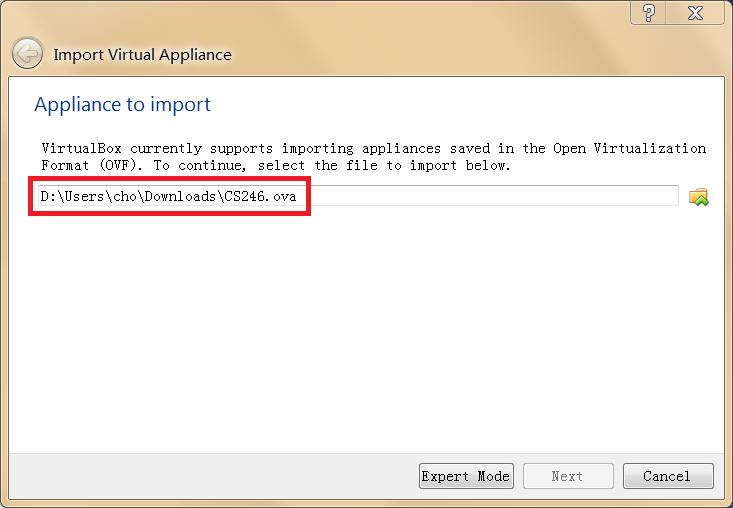
- Keep the default setting and click "Import" button. *Important*: DO NOT select "Reinitialize the MAC address..." option.

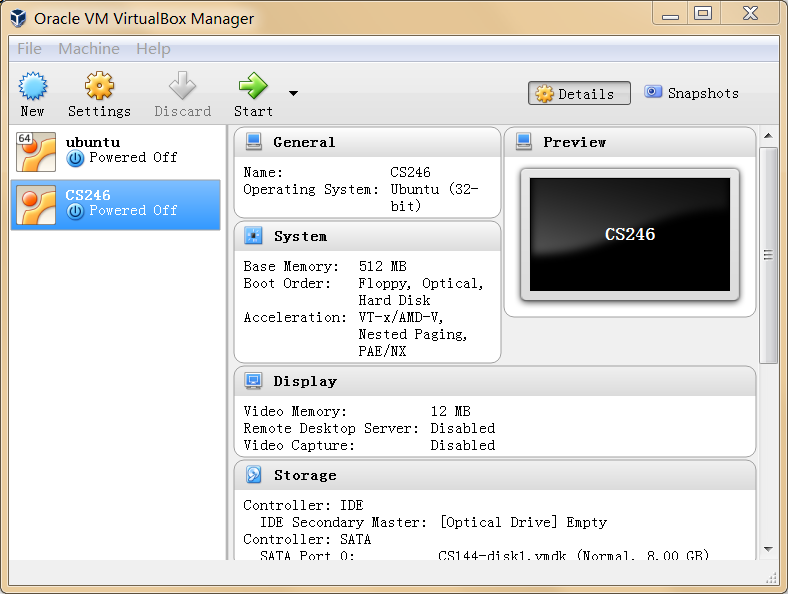
- Wait until import finishes. Once it is done, you will see the following window.
Step 3: Setup Shared Folder
You now need to set up a shared folder to transfer files between your host machine and the virtual machine easily.
- Create a new folder, say "C:\Users\cho\vm-shared", on your machine. This folder will be used as the shared folder between the host machine and the virtual machine.
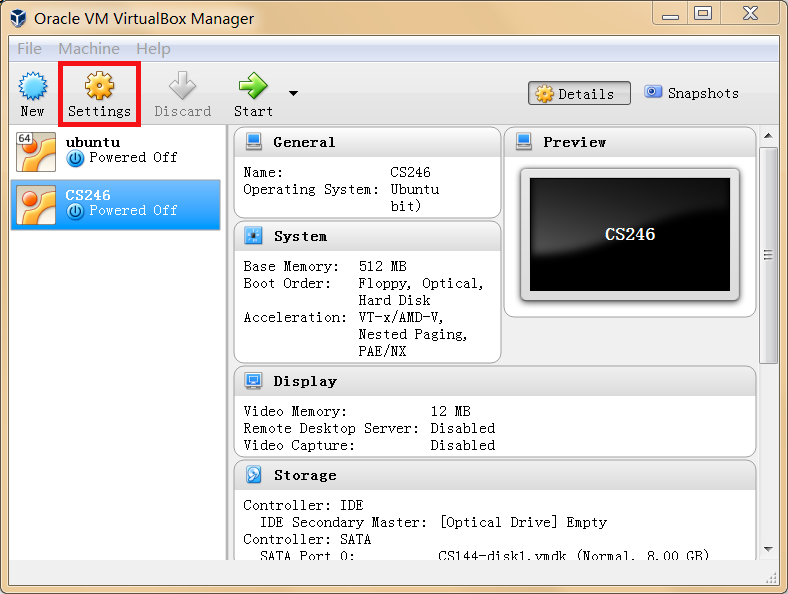
- Press "Settings" button on VirtualBox.
- Select "Shared Folders" and double click "vm-shared" in "Folders List".
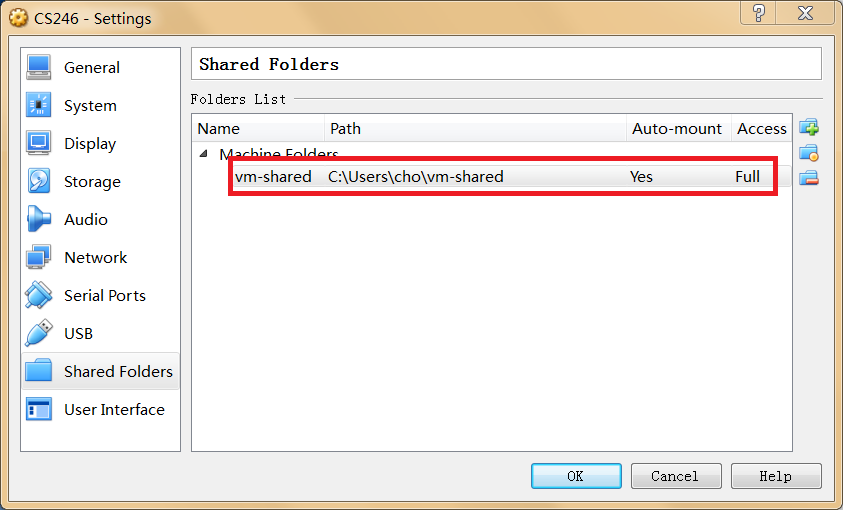
- Fill in the following information in the dialog box
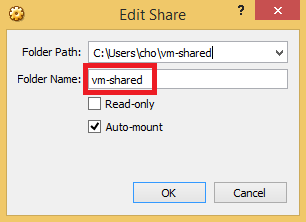
- Folder Path: select the shared folder that you created.
- Folder Name: vm-shared. (*It has to be vm-shared* even if your created folder name is different.)
- Do not select "Read-only" and select "Auto-mount"
- Press "OK" buttons to close dialog boxes.
Now your shared folder is set up. From now on, the "C:\Users\cho\vm-shared" folder on your host machine is accessible at "/home/cs246/shared/" in your virtual machine. If you copy a file to "C:\Users\cho\vm-shared" on your host machine, you can access the file in your virtual machine at "/home/cs246/shared/" and vice versa.
Step 4: Start Virtual Machine and Login
- Press "Start" button on your VirtualBox. Once the system finishes booting up, you will see the following screen.
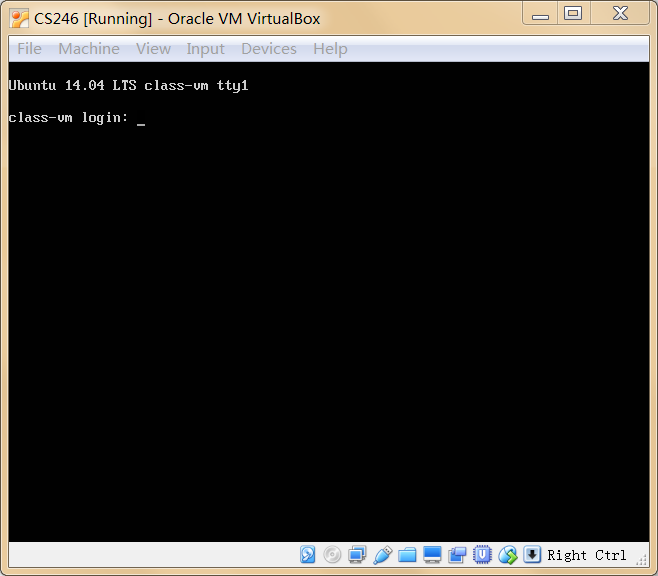
- Now you can login to the virtual machine using
username: cs246 and password: password.
Note: If you use Windows, and you see just a black screen after your virtual machine boots up, you may fix the problem by taking the steps in our FAQ.
SSH login to Virtual Machine
If desired, you can login to the virtual machine at "localhost" port 2462
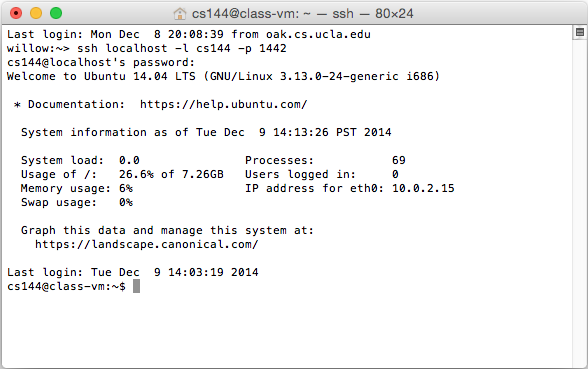
using a secure shell client from the host machine. This access method will make it easy to "cut-and-paste" some text from host to a file in your virtual machine, for example. On OS X, you can do it as follows:
- Open a terminal in the host and type the command 'ssh localhost -p 2462 -l cs246'
- If the terminal asks 'Are you sure you want to continue connecting?', type 'yes'.
- Then if the terminal asks for password, type 'password'.
- Now you are inside the virtual machine.
On Windows, you can use a secure shell client software, such as PuTTY.
Turning Off VirtualBox
To turn off your virtual machine, simply close the virtual machine
terminal window. Then you will be prompted with 3 options.

- Save the machine state: Save the current state (and resume from the current sate later). This is the recommended "suspend" method.
- Send the shutdown signal: Turn off the machine gracefully. This is the recommended "power off" method.
- Power off the machine: Turns off the guest machine immdiately. Do NOT use this option.
For a reboot, type "sudo reboot" in the virtual machine terminal.
Q: My VM starts to boot up, but it ends up with a completely black screen. I do not see any login prompt. How can I fix it?
A: It seems on some windows machine, your BIOS and windows setup does not enable the 64 bit mode support in a VM, which sometimes causes this problem (Our Ubuntu image is based on 64 bit OS). First check whether you indeed suffer from this issue by checking your guest "Operatiing System":
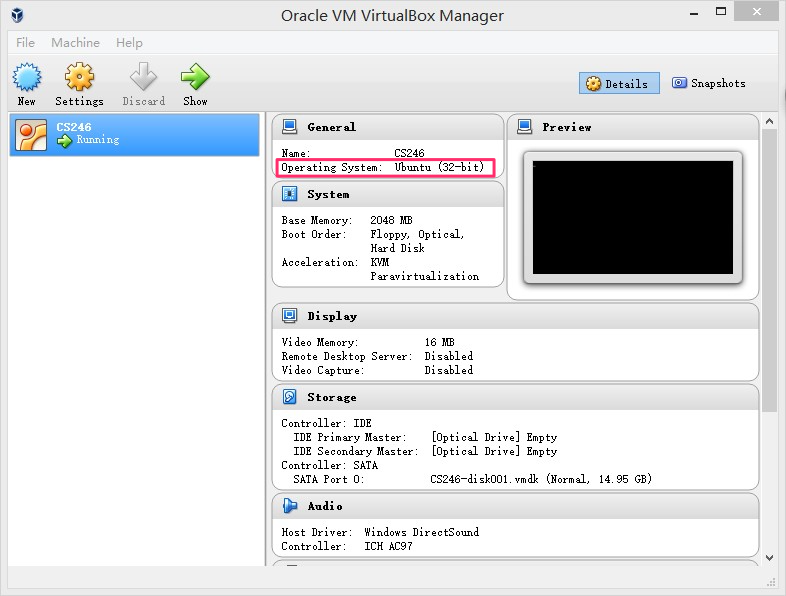
If it says Ubuntu (32-bit) like the above screen capture, it may indicate that you suffering from this issue.
To enable Ubuntu 64 bit VM on Windows, here is a possible solution (credit to Linzuo Li):
- Go to Windows features and make sure Hyper V is disabled
- To run both the host and VM in 64 bit, you need to enable a special support from the CPU. For example, for an Intel, go to BIOS settings and change the CPU configuration by enabling Intel Virtualization Technology.
- Go back to VirtualBox and change the OS to Ubuntu 64 bit.